


Table of Contents
ToggleCyberpunk interior design is taking over living rooms and bedrooms across the country, and it’s way more than just slapping neon signs on a wall. This edgy aesthetic, born from sci-fi, gaming culture, and dystopian futurism, brings sharp contrasts, bold lighting, industrial textures, and chrome accents into spaces that feel both cutting-edge and livable. Unlike some design trends that fade fast, cyberpunk works because it’s unapologetically bold while still giving you control over how extreme you take it. Whether you’re planning a full room overhaul or adding a few strategic elements, this guide walks you through the core elements, material choices, and actual DIY projects to bring that neon-soaked future aesthetic into your home.
Key Takeaways
- Cyberpunk interior design balances bold industrial aesthetics with practical DIY affordability, requiring intentional commitment to dark moody bases paired with electric neon accents rather than scattered elements.
- Layered LED strip lighting ($15–$50 per roll) and statement neon signs ($25–$300) are non-negotiable, as lighting creates the depth, atmosphere, and futuristic ambiance that defines the cyberpunk style.
- Core material choices include brushed metal, concrete, rubber, and glass textures paired against near-black or dark charcoal walls—avoiding mid-tones and warm colors in favor of cool, artificial vibrancy.
- Start with high-impact DIY projects like painting an accent wall (2–4 hours, $40–$80) or installing LED strip lighting (1–2 hours, $20–$50) before committing to larger furniture or structural changes.
- Cyberpunk interior design achieves visual impact through intentional material selection and strategic contrast, using fewer pieces with stronger visual impact rather than decorative abundance.
What Is Cyberpunk Interior Design?
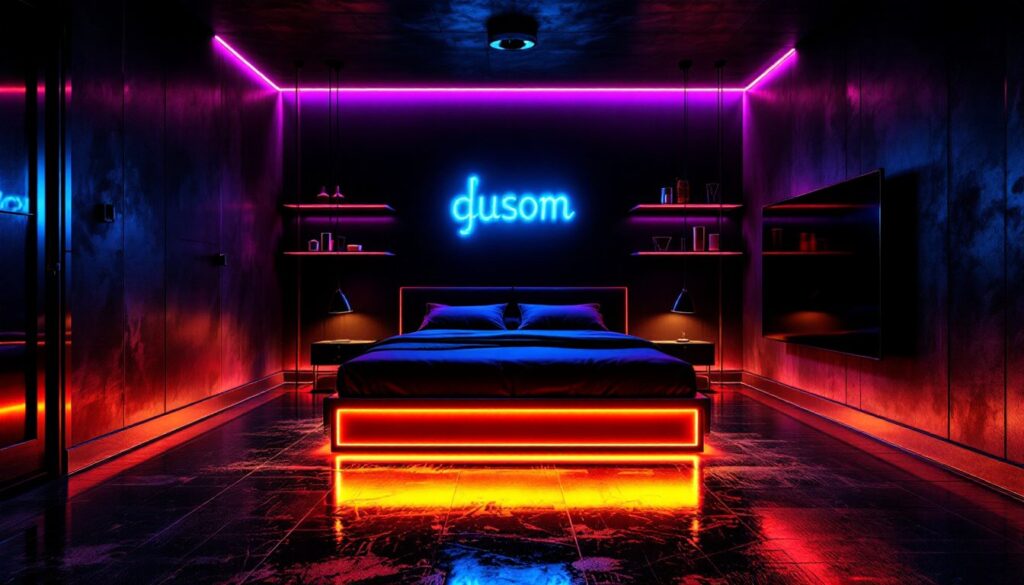
Cyberpunk interior design pulls inspiration from 1980s dystopian fiction, video games like Cyberpunk 2077, and the tech-forward aesthetics of Tokyo and Hong Kong streetscapes. At its core, it’s about merging industrial harshness with sleek futurism, think exposed metal, angular furniture, dark walls, and electric light sources that make a statement.
The style hinges on contrast and attitude. You’re mixing matte blacks with glossy metallics, geometric lines with organic textures, and moody shadows with brilliant pops of neon color. It’s not sterile or cold: it’s intentional and dramatic. A cyberpunk room might feature a dark gray accent wall paired with chrome shelving, LED strip lighting in deep purples, and furniture with sharp edges and angular silhouettes.
What makes cyberpunk practical for DIYers is that you don’t need a six-figure budget or professional installation. Many elements, neon lighting, metallic accents, wall treatments, can be tackled with basic tools and materials. The key is committing to the vision: half-hearted cyberpunk looks scattered, but a fully committed approach reads as intentional design. When exploring current interior design trends 2026, cyberpunk stands out as one of the most transformation-ready styles for hands-on home improvers.
Essential Color Palettes and Lighting
Neon and High-Contrast Colors
The signature cyberpunk palette is dark, moody, and punctuated by electric brights. Start with a base of near-black, dark charcoal, or deep navy, these dominate walls, larger furniture pieces, and flooring. Against this darkness, you’ll introduce pops of neon pink, electric blue, acid green, or purple in lighting, accent furniture, artwork, or small furnishings.
The contrast is intentional and jarring. Pair a black matte wall with a chrome shelving unit backlit by purple LED strips. Add a single accent chair in deep teal or neon pink. Use white or silver metallic elements to break up the darkness, chrome picture frames, stainless steel fixtures, foil-faced adhesive tape on cabinet edges. Avoid mid-tones and earth colors: cyberpunk rejects warmth in favor of cool, artificial vibrancy.
When choosing paint, opt for flat or matte finishes on walls to absorb light (semi-gloss on accents if you want shine). Sherwin-Williams Iron Ore, Benjamin Moore Cavern Clay, or Valspar Black Obsidian are solid near-black options that don’t look flat or lifeless. Test swatches under your intended lighting before committing, neon lights dramatically shift how dark colors read.
Ambient and Statement Lighting
Lighting is where cyberpunk design truly lives. This isn’t about a single ceiling fixture: it’s about layering multiple light sources to create zones of brightness and shadow. LED strip lights are your primary tool, they’re affordable ($15–$50 per roll), dimmable, and come in endless colors. Install them behind wall-mounted shelving, along baseboards, above doorways, or framing artwork. The glow creates depth and atmosphere without requiring electrical work beyond standard outlets.
Neon-tube accents (either traditional glass or flexible LED neon rope) add authentic cyberpunk punch. A neon sign spelling a word or icon in your accent color anchors the room’s visual interest. These run $30–$300 depending on size and custom work. Safe alternatives include LED neon rope lights ($20–$80), which mimic the look without the fragility or specialized installation.
For functional overhead lighting, use warm-white or cool-white LEDs (avoid yellowish bulbs that clash with neon accent colors). A dimmable smart bulb lets you adjust intensity and temperature, creating moody night-time settings and brighter working light when needed. Combine this with accent lighting for full control. Most DIYers can swap existing light fixtures: if you’re adding new circuits or installing dimmer switches, follow local electrical codes or hire a licensed electrician. Always wear safety glasses when working with any lighting installation.
Materials, Textures, and Furniture Selection
Cyberpunk spaces layer textures to avoid a flat, plastic appearance. Concrete, brushed metal, rubber, glass, and matte plastics are staples: natural wood is minimal or stained very dark.
Metal accents are non-negotiable. Look for brushed aluminum shelving, stainless steel brackets, chrome pipe fittings, and powder-coated steel frames. These can be sourced from hardware stores, online retailers, or even reclaimed from industrial suppliers. A simple DIY project: use steel U-channel or C-channel as floating shelf supports, mounted to wall studs with heavy-duty brackets. Pair these with a dark stained wood shelf or black glass for contrast.
Concrete or concrete-look finishes work on walls and floors. Pour-on epoxy floor coating in charcoal or metallic finishes transforms a basic concrete slab, this is a two-person job requiring surface prep, mixer, proper PPE (respirator, gloves, eye protection), and follow-up sealing. For walls, concrete-look wallpaper or texture paint achieves the vibe without the structural commitment. A dark polished concrete or aggregate tile floor completes the industrial foundation.
Rubber, silicone, and sleek plastic materials show up in furniture and accessories. Modular seating with angular lines, plastic storage cubes, and molded furniture fit the aesthetic. Upholstery should be matte fabrics (avoid glossy or velvet), charcoal, black, or your neon accent color work well. When sourcing furniture, lean toward minimalist, angular designs with clean lines rather than curved or ornate pieces.
Glass surfaces, shelving, desk tops, cabinet doors, add visual lightness and reflectivity. Pair glass with dark frames to maintain contrast. Mirrored or chrome accents multiply the effect of your lighting, amplifying the neon glow. This is why strategically placed mirrors or chrome panels behind light sources create the illusion of deeper, more saturated color. Following best interior design principles, cyberpunk prioritizes intentional material selection over abundance, fewer pieces, stronger impact.
Practical DIY Projects to Get Started
You don’t need to gut a room to embrace cyberpunk. Start with these approachable projects:
1. Install LED strip lighting (1–2 hours)
Measure the perimeter of your target area (behind shelving, above cabinets, along a wall edge). LED strips come with adhesive backing: clean the surface thoroughly with rubbing alcohol to remove dust and oils so adhesive sticks properly. Mark your path lightly with pencil. Apply the strip in smooth, continuous lines, pressing firmly every few inches. Plug into a smart plug or dimmer-compatible power outlet. Most strips include remote controls for color and brightness adjustment.
Tools: Measuring tape, rubbing alcohol, cloth. Cost: $20–$50 per 16-foot roll.
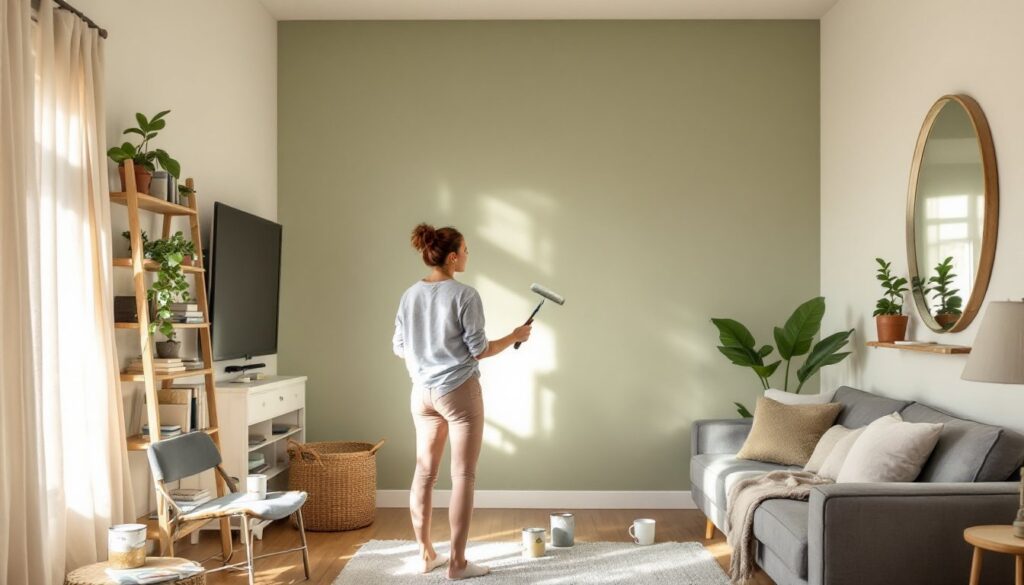
2. Paint an accent wall (2–4 hours)
Choose one wall for maximum impact. Prep by patching holes, sanding rough spots, and wiping clean. Apply primer (yes, primer, it levels color and improves adhesion, especially on dark shades). Use 2–3 coats of your chosen dark paint, waiting full dry time between coats (check manufacturer specs: many dark paints need 24 hours). A 9-inch roller cover covers about 350 square feet per gallon: a standard bedroom wall typically needs one gallon. Invest in quality brushes and rollers, cheap ones shed fibers and leave streaks.
Tools: Paint roller, brush, primer, drop cloth, painter’s tape, ladder. Safety: goggles and gloves. Cost: $40–$80 for quality paint and primer.
3. Build a floating shelf with metal brackets (3–4 hours)
Locate wall studs using a stud finder (essential: missed studs mean shelf collapse). Mark stud locations lightly with pencil. Install two heavy-duty L-brackets or steel shelf supports per shelf, drilling pilot holes through drywall into studs and securing with lag bolts or heavy-duty anchors. Lay your shelf (black glass, dark stained wood, or industrial steel) on the brackets and secure with provided hardware.
Tools: Stud finder, drill/driver, level, socket wrench, measuring tape. Safety: safety glasses, work gloves. Check load ratings: most brackets support 50–100 lbs per shelf. Cost: $15–$40 for brackets, $30–$100 for shelf material.
4. Add a neon sign or LED neon rope (1 hour, mostly waiting)
Choose your location, usually an accent wall, above a desk, or beside a bed. Mount using the included brackets (most neon signs come pre-mounted). Route power cord to nearest outlet using wire management clips to keep it tidy. Plug in and test. LED neon rope can be routed around shelves, door frames, or window edges: secure with clips every 12 inches for even support.
Tools: Screwdriver, wire clips, drill. Safety: Work gloves to avoid handling neon if it’s fragile glass. Cost: $25–$300 depending on size and customization.
For more guidance, consult interior design tips on tackling accent features and interior design ideas for project inspiration across different room types. Reviews of smart lighting technology on Design Milk and CNET showcase cutting-edge cyberpunk-compatible lighting and home automation options worth exploring before purchasing.
Conclusion
Cyberpunk interior design rewards commitment and intentionality. The palette is bold, the materials are industrial, and the lighting does the heavy lifting, but every element serves the aesthetic. Start with one high-impact project (accent wall and LED strips are a powerful combo), commit to the dark moody base with electric accents, and layer in metal and textured materials as your budget allows. The result is a space that feels genuinely futuristic and distinctly yours.